Heusinkveld pedals and Fanatec wheelbases operate as separate USB devices on PC, which means the pedals do not connect through the Fanatec wheelbase's RJ12 pedal port. Each component communicates directly with Windows using its own driver software and appears as an independent controller in simulation titles. This guide walks through the complete process - from physical USB connection and driver installation to input mapping inside racing simulators - for anyone pairing Heusinkveld's load-cell pedal sets with a Fanatec DD, CSL DD, or CSL Elite wheelbase.
You will need at least one free USB port or a powered USB hub, because the Heusinkveld controller board and the Fanatec wheelbase each require a dedicated connection. Once both devices are recognized by Windows, every sim requires individual input binding: steering from the Fanatec base and pedal axes from the Heusinkveld unit. The setup is straightforward but differs from Fanatec's all-in-one ecosystem, where pedals plug into the wheelbase and share a single USB link.
This approach gives you the flexibility to upgrade pedals independently without replacing your entire wheelbase, and it ensures that high-resolution load-cell data from Heusinkveld reaches your PC without passing through Fanatec's signal chain. By the end of this guide, you will understand USB topology, driver coexistence, input assignment in popular sims, and how to resolve the most common device-conflict and calibration issues.
Why Heusinkveld Pedals Require Separate USB Connection
Heusinkveld pedals connect to your PC via their own dedicated USB cable and operate independently of the Fanatec wheelbase. Unlike Fanatec's own pedals, which plug into the wheelbase's RJ12 pedal port and send input through the wheelbase, Heusinkveld pedals use a built-in USB controller that communicates directly with the PC. This separate connection is not a workaround - it is the standard design for load-cell pedal sets that require high-resolution analog data and independent calibration.
Fanatec wheelbases route pedal signals through a single combined controller, which limits the resolution and calibration options available to third-party load-cell hardware. By using a separate USB connection, Heusinkveld pedals preserve full 16-bit resolution per axis and allow calibration, curve adjustment, and firmware updates through the dedicated SmartControl software. The wheelbase and pedals appear as two distinct DirectInput or game controller devices in Windows, and most simulators recognize both without conflict.
This architecture means you will have two USB cables running from your rig to the PC: one for the Fanatec wheelbase and one for the Heusinkveld pedals. Each device operates on its own driver stack, so a firmware update or recalibration of one does not interfere with the other. The independent USB path also ensures that pedal input latency and polling rate are not constrained by the wheelbase's internal bus, giving you direct, unfiltered communication between the load cells and the sim.
In practice, this separation simplifies troubleshooting and allows you to mix and match hardware from different manufacturers without losing functionality. The pedals will continue to function even if the wheelbase is powered off or disconnected, which can be useful when calibrating or testing pedal response outside of a racing session.
What You Need Before Starting
- Heusinkveld pedal set (Sprint, Ultimate, or Pro) with USB cable
- Fanatec wheelbase (CSL DD, DD1, DD2, or Podium) with USB cable and Fanatec driver package installed
- Two available USB ports on PC or powered USB hub
- Heusinkveld SmartControl software downloaded from Heusinkveld website
- Latest Fanatec driver package installed and wheelbase firmware updated
- Sim platform installed (iRacing, ACC, rFactor 2, or similar) with controller configuration access
Step 1: Install and Update Fanatec Driver Package
Before connecting your Heusinkveld pedals, make sure your Fanatec wheelbase is running the latest driver and firmware. Visit the Fanatec website, navigate to the support or downloads section, and download the most recent driver package for your specific wheelbase model. Run the installer and follow the on-screen prompts to complete the setup. Once installed, open the Fanatec Control Panel application from your Start menu or desktop shortcut.
Inside the control panel, check the firmware version displayed for your wheelbase. If an update is available, the software will typically prompt you or display a notification. Follow the firmware flashing process carefully - keep the wheelbase powered and connected via USB throughout the update, and do not disconnect until the process completes. Interrupting a firmware flash can cause connectivity issues or require a factory reset.
After the update finishes, open Windows Device Manager or Game Controllers in the control panel to confirm that your Fanatec wheelbase appears as a recognized game controller. You should see the device listed by name, and testing the inputs in the Windows game controller properties should show axis and button response. This baseline check ensures the wheelbase is communicating properly with Windows before you introduce a second USB input device for the pedals.
Keeping the Fanatec driver current helps avoid compatibility conflicts when you add standalone pedals that use their own USB connection and software stack.
Step 2: Connect and Configure Heusinkveld Pedals via SmartControl
Heusinkveld pedals connect directly to your PC via USB and are configured independently of the Fanatec wheelbase using the manufacturer's SmartControl software. Plug the USB cable from your Heusinkveld pedal set into an available USB port on your computer; Windows will recognize the device as a game controller, and each pedal axis will appear as a separate input. Download SmartControl from the Heusinkveld website, install it, and open the application to access calibration and tuning options for throttle, brake, and clutch axes.
Within SmartControl, run the initial calibration routine by pressing each pedal through its full travel range to set minimum and maximum values. The brake pedal, which typically uses a load cell sensor, requires special attention: adjust the force curve to match your preferred pedal pressure, ensuring the software registers zero input at rest and 100 percent at your desired maximum force. Each axis can be fine-tuned independently, allowing you to set different curves, dead zones, and sensitivity profiles without affecting the other pedals.
SmartControl functions as the configuration layer for your pedals only - it does not communicate with your sim racing titles or the Fanatec wheelbase. Once calibrated, the pedal inputs are sent to Windows as standard game controller axes, ready to be mapped inside your racing sim or third-party input management software. Verify correct operation by watching the input test bars in SmartControl as you press each pedal; smooth, linear movement from 0 to 100 percent confirms successful setup. Save your profile in SmartControl so calibration persists across reboots, and remember that any further adjustments to pedal feel or response curve happen in this software, not in the Fanatec driver suite.
Step 3: Verify Both Devices Appear in Windows Game Controllers
Open Windows Settings and navigate to Devices > Printers & scanners > Devices and printers, or press Win + R and type joy.cpl to launch the Game Controllers panel directly. You should see two separate devices listed: your Fanatec wheelbase (often labeled as "Fanatec CSL Elite" or similar model name) and your Heusinkveld pedals (typically "Heusinkveld Sim Pedals" or "HE Pedals"). If only one device appears, check USB connections and confirm both drivers installed correctly in the previous steps. Select each device and click Properties to open the test dialog. For the Heusinkveld pedals, press each pedal slowly and watch the corresponding axis bar move smoothly from rest to full travel; for the wheelbase, rotate the wheel and press buttons to verify input registration. This Windows-level test confirms USB communication is working before you open any sim software, saving time if a device isn't detected.
If an axis does not respond or shows constant movement without input, disconnect and reconnect that device's USB cable, then reopen the properties dialog. Pedals with load-cell brakes may show a small baseline value at rest - this is normal and will be calibrated inside your racing sim. Once both devices respond correctly in the Game Controllers panel, you're ready to map inputs in your simulator.
Step 4: Assign Wheel and Pedal Inputs in Your Sim Platform
Once Windows recognizes both your Fanatec wheelbase and Heusinkveld pedals as separate game controllers, the next step is to assign their inputs inside your simulation platform. Each sim handles controller configuration differently, but the core principle remains the same: map steering and button inputs to your Fanatec device, and map throttle, brake, and clutch axes to your Heusinkveld device.
In iRacing, navigate to Options > Controls. The top section lists all detected devices by name. Click on the Fanatec wheelbase entry to assign steering axis and wheel buttons. Then click on the Heusinkveld pedals entry (often labeled by the SmartControl software device name) to assign throttle, brake, and clutch. iRacing auto-detects most axes, but you may need to manually click the axis field, press the pedal, and confirm the assignment if the software does not populate it automatically.
Assetto Corsa Competizione uses a similar workflow. Open the Controls menu from the main interface, select the Fanatec device for steering and buttons, then switch to the Heusinkveld device for pedal axes. ACC typically auto-detects axes when you press each pedal during the binding process, so confirm that throttle, brake, and clutch appear under the correct device name.
rFactor 2 organizes inputs under Controller in the Settings menu. It lists all connected devices and allows you to assign each control individually. Select your Fanatec wheelbase for steering and buttons, then select your Heusinkveld pedals for each pedal axis. rFactor 2 does not always auto-populate axes, so click each input field, press the corresponding pedal, and verify the device ID matches your Heusinkveld unit.
Some sims, including Automobilista 2 and BeamNG.drive, offer combined device profiles that attempt to merge all inputs into one controller preset. If your sim supports this, ensure you manually override the default mapping to keep wheel and pedal inputs on their respective devices. Mixing device IDs within a single profile can lead to input conflicts or unresponsive axes.
After mapping, test each input in the sim's calibration screen or during a practice session. Steering should respond smoothly through the Fanatec wheelbase, and each pedal axis should register full travel without overlap or interference. If an axis does not respond, return to the control settings and verify the device name matches the Heusinkveld pedals, not the wheelbase or another controller.
Managing USB Bandwidth and Hub Placement
USB bandwidth becomes a bottleneck when your motherboard shares controller resources between multiple high-speed devices like VR headsets, stream cameras, and sim peripherals. Heusinkveld pedals and Fanatec wheelbases both present as low-latency HID devices, so the risk of interrupt conflicts is minimal - but physical port availability and bandwidth allocation still matter.
If your motherboard has fewer than four free USB ports or you notice input lag when running VR simultaneously, a powered USB 3.0 hub solves both problems. Look for hubs rated for at least 2 A per port and connect the hub's power supply; bus-powered hubs can brown out under load from force-feedback bases and load-cell pedals. Plug the hub into a dedicated USB 3.0 root controller - check Device Manager under "Universal Serial Bus controllers" to see which physical ports share the same xHCI host.
Do not connect Heusinkveld pedals through the USB pass-through ports on the back of your Fanatec wheelbase. While Fanatec's hub works for compatible accessories like the handbrake or shifter, third-party USB devices may not enumerate correctly or may introduce intermittent dropouts. Run a separate USB cable from the pedals directly to your PC or powered hub to maintain stable communication.
Mount the hub on your rig frame using velcro straps or adhesive clips so cables exit cleanly without tension on the connectors. This keeps the setup reliable during aggressive braking and prevents accidental disconnects mid-session.
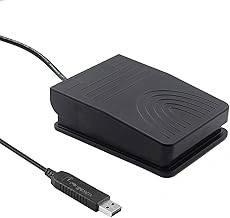
iKKEGOL USB Foot Pedal Switch for PC Gaming
When all three axes of your Heusinkveld pedals are mapped to throttle, brake, and clutch, you may still need an auxiliary input for functions like push-to-talk, pit limiter, or menu navigation. The iKKEGOL USB Foot Pedal Switch offers a low-cost way to add one more programmable foot input to your rig without occupying a hand or reaching for the keyboard mid-session.
This single-pedal USB switch connects independently of both your Heusinkveld set and Fanatec wheelbase, appearing as a separate keyboard device in Windows. You can assign it to any key command through the included software, then map that key in your sim or voice chat application. Because it operates as a simple on/off switch rather than an analog axis, it works well for binary actions - toggling the pit limiter in iRacing, activating TeamSpeak push-to-talk, or cycling through in-game menus without lifting your hands from the wheel.
The pedal is lightweight plastic with a non-slip rubber base; the spring tension is light, so actuation requires little effort. Placement flexibility is useful: mount it on the left side of your rig for pit-limiter duty or near your desk chair for voice comms. The six-foot USB cable provides enough reach for most setups, and Windows recognizes the device immediately without additional drivers.
This is not a substitute for a proper load-cell or hydraulic pedal - it has no analog resolution and the build quality is basic. But as a supplementary input that frees your hands during races or practice sessions, it fills a specific gap at a modest price. If you find yourself toggling functions mid-corner or fumbling for hotkeys during multiplayer, a dedicated foot switch can improve focus and consistency without adding complexity to your primary pedal or wheelbase configuration.
- ✅ Inexpensive way to add an extra foot-operated input
- ✅ Appears as standard keyboard device; no complex driver setup
- ✅ Light actuation and flexible placement around the rig
- ✅ Six-foot USB cable reaches most desk or cockpit positions
- ⚠️ Lightweight plastic construction feels basic
- ⚠️ Single pedal only; no multi-pedal option in this model
- ⚠️ On/off switch with no analog sensitivity
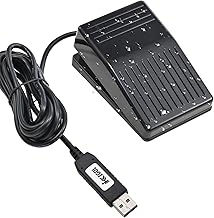
iKKEGOL Programmable USB Foot Pedal with Mechanical Switch
When you need programmable foot control beyond your sim pedals - for macros, push-to-talk, or custom commands - the iKKEGOL Programmable USB Foot Pedal with Mechanical Switch offers a simple plug-and-play solution. It connects via USB as an independent HID device, so it operates alongside Heusinkveld pedals and Fanatec wheelbases without driver conflicts or port sharing.
The mechanical switch provides tactile feedback, making it easy to confirm activation during a race or stream. Because it registers as a generic keyboard or programmable input, you can map it inside Windows or third-party macro software to trigger TeamSpeak, Discord, or in-game menu functions that would otherwise require a hand off the wheel. This keeps your hands free and your workflow efficient when you need secondary controls that don't belong on the main pedal set.
At $19.99, it's a low-risk addition for users who want dedicated foot-actuated macros without adding complexity to the sim pedal chain. Setup is straightforward: plug the USB cable into an open port, install the companion configuration utility if you want custom key assignments, and bind the output in your target application. The pedal sits flat on the floor or rig platform and stays put under light to moderate pressure, though heavier stomps may require non-slip backing or a simple velcro mount.
If you're running out of button-box real estate or prefer foot input for repetitive commands, this pedal slots into your setup without interfering with Heusinkveld or Fanatec communication. It won't replace analog brake feel, but it fills a niche for toggle and macro tasks that don't require graduated input.
Check current price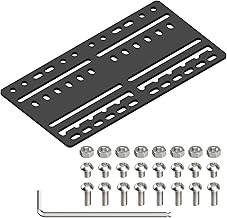
JOYORAN Sim Racing Bracket Plate for Shifters and Handbrakes
When building a mixed-brand cockpit with Heusinkveld pedals and Fanatec shifters or handbrakes, mounting hardware to multiple aluminum extrusion often reveals mismatched hole patterns and spacing. The JOYORAN Sim Racing Bracket Plate addresses this by offering a universal aluminum adapter plate designed to bridge incompatible mounting footprints on multiple×multiple, multiple×multiple, and similar profile systems.
The plate measures approximately the listed amount × multiple and features a grid of M6 and M8 threaded holes arranged to accommodate most aftermarket sim racing peripherals, including Fanatec shifters, handbrakes, and button boxes. The anodized aluminum construction provides rigidity under load without adding significant weight, and the plate can be oriented horizontally or vertically depending on cockpit geometry.
Installation requires standard M6 or M8 bolts and T-nuts for the extrusion frame. Because the hole pattern is universal rather than device-specific, you may need to experiment with positioning to align your exact hardware. Some users find the spacing ideal for Fanatec SQ shifters and handbrakes, while others use shims or washers to fine-tune alignment for components with non-standard mounting points.
The bracket does not include fasteners, and the included instructions are minimal. If your Heusinkveld pedal tray or Fanatec shifter uses proprietary spacing, verify dimensions before ordering to confirm compatibility. For rigs already using multiple or equivalent extrusion, this plate offers a low-cost solution to mount accessories without drilling custom holes or fabricating adapters.
- ✅ Universal hole pattern fits most Fanatec shifters and handbrakes
- ✅ Anodized aluminum construction provides stable mounting surface
- ✅ Compatible with 40×40mm and 40×80mm extrusion profiles
- ✅ Low-profile design minimizes added height in tight cockpits
- ⚠️ Fasteners and T-nuts not included
- ⚠️ May require shims for non-standard mounting footprints
- ⚠️ Minimal documentation for hole spacing and alignment
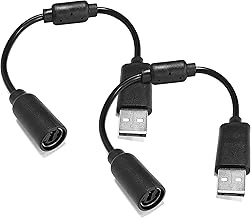
BlingKingdom USB Breakaway Cables for Xbox 360 & Racing Wheels
Accidental cable snags during aggressive driving can shear USB ports on both the Fanatec wheelbase and Heusinkveld pedal controllers, leading to expensive repairs or replacements. The BlingKingdom USB Breakaway Cables for Xbox 360 & Racing Wheels add a magnetic disconnect point in your USB connection, releasing cleanly when pulled instead of transferring force to the port. This inexpensive inline adapter works with any standard USB multiple connection and requires no setup - just insert it between your wheelbase or pedal controller and the PC cable.
The breakaway design uses a magnetic coupling that reconnects instantly after a disconnect, so brief tugs or accidental foot contact won't interrupt your session permanently. At $6.49, adding one to each USB device in your rig provides cheap insurance against port damage, especially if you use a motion rig, have limited cable routing space, or tend to move equipment frequently. The 4.6/5 rating reflects reliable breakaway function, though the magnetic hold is lighter than OEM Xbox 360 cables and may release during normal repositioning if cable tension is high.
Use this cable on any USB device where the port is vulnerable - wheelbase, pedal controller, shifter, or handbrake. Route the cable so the breakaway point sits in a low-tension zone, not at a sharp bend or under load. If you're running both Heusinkveld pedals and a Fanatec wheelbase, consider two units to protect both USB connections. The breakaway won't prevent signal loss during a disconnect, so secure your main cable runs to avoid unintended separation mid-race.
- ✅ Inexpensive protection against USB port damage from cable snags
- ✅ Magnetic breakaway releases cleanly under tension
- ✅ Reconnects instantly after accidental disconnect
- ✅ Works with any standard USB 2.0 device
- ⚠️ Lighter magnetic hold may release during normal cable repositioning
- ⚠️ Does not prevent signal interruption during disconnect
Common Mistakes to Avoid
Several common mistakes can prevent Heusinkveld pedals from working correctly with a Fanatec wheelbase, often leading to double inputs, unresponsive controls, or configuration errors in your racing sim. Avoiding these pitfalls will save troubleshooting time and ensure smooth operation from the start.
One frequent error is attempting to connect Heusinkveld pedals to the Fanatec wheelbase's RJ12 pedal port. Heusinkveld pedals are standalone USB devices and cannot communicate through the Fanatec wheelbase - they must connect directly to the PC via USB. The RJ12 port on the wheelbase is designed exclusively for Fanatec's own pedal sets.
Another mistake is installing only the Fanatec driver package and skipping the Heusinkveld SmartControl software. Each device requires its own driver: the Fanatec driver manages the wheelbase and any connected Fanatec peripherals, while SmartControl configures the Heusinkveld pedals' calibration, brake force curves, and input recognition. Without SmartControl installed, your sim will not recognize the pedals properly.
In-game, a typical configuration error is mapping both devices to the same controller ID or axis set. Many sims auto-detect multiple controllers, which can result in conflicting inputs if both the Fanatec wheelbase and Heusinkveld pedals are assigned to overlapping axes. Always assign steering to the Fanatec device and pedal axes to the Heusinkveld controller, checking that no duplicate bindings exist.
Using an unpowered USB hub for high-current devices like load-cell pedals can cause intermittent disconnections or erratic input behavior. Heusinkveld pedals draw more power than basic peripherals, so connect them directly to a motherboard USB port or through a powered hub with adequate amperage per port.
Finally, if you have disconnected Fanatec pedals but left their input bindings active in your sim, the game may still listen for pedal input from the wheelbase controller ID, resulting in no throttle or brake response. Disable or clear any Fanatec pedal mappings in the control settings when running Heusinkveld pedals alone. Double-checking each of these points before your first session will ensure both devices operate independently and as intended.
Final Takeaway
Heusinkveld pedals and Fanatec wheelbases coexist as independent USB devices with no protocol conflict, making mixed-brand setups a standard practice in high-end sim racing. Each component connects to its own driver software - Heusinkveld SmartControl for the pedals, Fanatec Control Panel for the wheelbase - so calibration, input mapping, and firmware updates are managed separately. Once you configure each device in your sim and save the profile, the setup remains stable across reboots and game launches without requiring manual re-mapping.
Periodic firmware checks for both ecosystems help maintain compatibility with new sim titles and operating-system updates. Check the Heusinkveld and Fanatec support pages every few months, especially before major sim releases or Windows feature updates. This proactive approach prevents conflicts and ensures both devices expose their inputs correctly to DirectInput and racing sims.
Because the pedals and wheelbase operate independently, you can upgrade or replace one without disturbing the other. Your brake-curve profiles, force-feedback settings, and per-sim input bindings are stored separately, so swapping a Fanatec base for a different brand - or adding a Heusinkveld handbrake - requires only new driver installation and input re-mapping for the changed component. This modularity is a key advantage of USB-based sim hardware and why many enthusiasts prefer standalone pedals over all-in-one ecosystems.