Mixing sim racing pedals and wheelbases from different manufacturers on PC is fully supported - each device connects via its own USB cable, installs independent drivers, and appears as a separate controller in Windows and your simulation software. Unlike console ecosystems that often require matched hardware from a single vendor, PC sim racing treats pedals and wheelbases as standalone input devices, so you can pair a Fanatec wheelbase with Heusinkveld pedals, or a Thrustmaster base with Moza pedals, without compatibility barriers at the operating system level.
The core workflow has four steps: route each device to a dedicated USB port or powered hub, allow Windows to enumerate both controllers, install the manufacturer-specific driver for each piece of hardware in sequence, then open your simulation title and bind steering, throttle, brake, and clutch inputs from the separate device IDs. This guide covers USB topology planning to avoid bandwidth conflicts, driver installation order to prevent Device Manager collisions, input mapping inside popular sims, and troubleshooting steps when pedals or wheels fail to register or produce overlapping axis data.
We exclude console configurations - PlayStation and Xbox require certified, often brand-matched equipment - and wireless-only setups, since most load-cell pedal sets and direct-drive wheelbases rely on wired USB for low-latency telemetry and firmware updates. By the end of this walkthrough, you will understand how to physically connect mismatched gear, manage two or more driver stacks on the same Windows installation, and configure your sim to read steering from one USB device and pedal axes from another without input conflicts or dead zones.
Who This Guide Is For
This guide is designed for PC sim racers who are mixing and matching pedals and wheelbases from different manufacturers. If you've upgraded to load cell pedals while keeping your original wheelbase, purchased a direct drive unit without replacing your existing pedals, or assembled a rig from components across brands like Fanatec, Thrustmaster, Heusinkveld, or Simucube, this walkthrough covers the connection and configuration steps you need.
You'll also find this useful if you're salvaging working components after a partial upgrade, combining entry-level and enthusiast-grade hardware, or simply want the flexibility to upgrade one part of your setup without being locked into a single ecosystem. The focus here is strictly on PC configurations where both devices connect via USB and require independent driver management and input mapping.
This guide does not cover console compatibility scenarios, as PlayStation and Xbox have closed ecosystems that require specific licensed hardware. If your entire setup came as a single all-in-one bundle and connects through one USB port, you likely won't encounter the routing and driver challenges addressed here. The methods outlined assume you're comfortable installing software, accessing Windows device settings, and configuring controls within sim racing titles.
What You Need Before Connecting
Before you connect mismatched sim racing pedals and wheelbases, confirm you have the physical and software prerequisites ready. Each device - wheelbase and pedal set - needs its own dedicated USB port on your PC. Most modern sim racing wheelbases and pedals connect via USB Type-A or USB Type-B, so check the cable included with each unit and ensure your motherboard or case has available ports. If you're running low on ports, a powered USB hub rated for at least 2 amps per port will keep high-draw pedals like load-cell sets stable without voltage drops.
Download the latest driver packages directly from each manufacturer's support page before plugging anything in. Thrustmaster, Logitech, Fanatec, Moza, and Simagic all provide Windows driver installers that handle firmware updates, calibration utilities, and input detection. You'll need administrator access to your Windows user account to install these drivers and allow the operating system to recognize each device correctly. Run Windows Update beforehand to ensure your USB controller drivers are current, especially if you're using older motherboards or USB 2.0 ports.
Secure both the wheelbase and pedals to a rig or desk before making any USB connections. Loose mounting can cause flex during use, which may trigger phantom inputs or interrupt USB communication when cables shift. Verify that each device has its own power supply plugged in and switched on - many wheelbases require a separate AC adapter, and some high-end pedal sets draw power through a barrel connector rather than USB alone. USB 2.0 ports deliver up to 500 mA per device, while USB 3.0 can supply 900 mA; if your pedals pull more current than that, you'll need either a powered hub or a device with an external power brick to avoid random disconnects mid-session.
Once hardware is mounted and drivers are downloaded, you're ready to connect each device one at a time, starting with the wheelbase, then the pedals. This step-by-step approach prevents Windows from creating duplicate or ghost device entries that can complicate input mapping in your sim later.
Step 1: Physical USB Connection Order
Establishing the correct physical connection sequence prevents Windows from assigning conflicting device IDs and reduces dropped input during extended sessions. Power off your PC completely before connecting any sim racing hardware. Connect your wheelbase's USB cable directly to a rear-panel USB port on your motherboard - these ports typically deliver cleaner power delivery and more stable data lanes than front-panel headers, which often share bandwidth with internal connectors. Once the wheelbase cable is seated, connect your pedal set's USB cable to a separate rear-panel port. Never daisy-chain pedals through a wheelbase USB hub unless the manufacturer's documentation explicitly supports that topology; most mismatched setups require independent USB connections to avoid input conflicts. After both cables are secure, power on the wheelbase and pedal units in sequence, allowing each device's internal firmware to initialize. Only then should you boot Windows, giving the operating system a stable enumeration order for device drivers. This connection order minimizes the risk of duplicate HID entries and ensures each component registers with the correct driver stack from the first session.
Step 2: Driver Installation Without Conflicts
Installing drivers for mismatched sim racing hardware requires a deliberate sequence to prevent conflicts. Start by connecting only your wheelbase to the PC, then install its manufacturer-provided driver package - download the latest version from the brand's official support page rather than relying on Windows Update. Reboot the system after the wheelbase driver installation completes. Once the PC restarts, connect your pedals and repeat the process: install the pedal driver package, then reboot again. This staged approach ensures Windows assigns unique device identifiers and prevents one manufacturer's control software from attempting to manage the other brand's hardware.
Windows often auto-detects game controllers as generic HID-compliant devices, which allows basic input recognition but may disable advanced features like adjustable brake force curves or independent axis calibration. Open Device Manager (Win + X, then select Device Manager) and expand the "Human Interface Devices" and "Game controllers" sections to verify each component appears with its correct manufacturer name - for example, a Thrustmaster wheelbase and Fanatec pedals should list as two distinct entries, not generic "USB Game Controller" labels. If you see "Unknown Device" with a yellow exclamation mark, right-click the entry, select "Update driver," then choose "Browse my computer for drivers" and point to the folder where you extracted the manufacturer's driver package.
Brands like Fanatec, Thrustmaster, and Logitech typically require proprietary control software to unlock firmware updates and configuration options, while simpler pedal sets from Heusinkveld or Ricmotech often enumerate as standard HID devices without additional software. Check each manufacturer's documentation to confirm whether manual driver installation is mandatory or optional. If both devices demand always-running background software, verify in Task Manager that both utilities launch at startup without interfering - some older control panels attempt to claim exclusive access to all USB game controllers, which will block the second device. In those cases, disable the aggressive software's auto-launch and configure devices through in-game controller menus instead. After both drivers are confirmed active in Device Manager, your sim racing title should detect two separate input sources ready for independent button and axis mapping.
Step 3: Game and Sim Software Input Mapping
Once Windows recognizes both your wheelbase and pedals as separate USB devices, the next step is mapping them inside your sim racing software. Most modern racing simulators - including iRacing, Assetto Corsa Competizione, rFactor 2, and Automobilista 2 - detect multiple input devices independently and allow you to assign steering, pedals, and buttons from different hardware without conflict.
Open your sim's control settings and look for the input binding menu. You'll typically see a list of all detected devices, each identified by its manufacturer name or device ID. Start by binding the steering axis: turn your wheel and the software will highlight the active device. Assign that axis to steering. Then move to the pedal bindings - press each pedal in turn and assign throttle, brake, and clutch to the axes your pedal set reports. Because the devices communicate separately over USB, the sim treats them as distinct inputs and routes them correctly without additional software.
Some sims offer a "combined input" mode that merges all connected controllers into a single virtual device, while others default to "separate device" mode. Separate device mode is generally clearer for mismatched setups, since you can see exactly which hardware is bound to each function. If your sim uses combined mode and you experience axis conflicts, check the settings menu for a toggle to switch to individual device assignment.
Pay attention to axis behavior during initial testing. If your brake pedal shows full input at rest, enable axis inversion for that channel. If steering feels unresponsive near center, adjust the deadzone slider - most sims let you set this per-axis. Run a few laps to confirm throttle and brake travel smoothly across their full range and that steering responds linearly without jumps or dead spots.
After binding, save your control profile with a descriptive name that references both devices, so you can reload it quickly if the sim resets settings or you swap hardware. This per-sim mapping process is the final link between your mismatched pedals and wheelbase, turning separate USB signals into coordinated driving input.
Common Mistakes to Avoid
Most connection failures with mismatched sim racing pedals and wheelbases stem from a handful of avoidable mistakes. Daisy-chaining USB devices through a wheelbase's passthrough port when the manufacturer does not explicitly support that configuration is a common issue - most wheelbases reserve their passthrough for their own ecosystem pedals, and forcing third-party units through that port can result in intermittent dropouts or the device not appearing at all. Always connect mismatched pedals directly to a dedicated USB port on your PC or through a powered hub plugged into the motherboard.
Installing outdated or mismatched driver versions creates conflicts that can prevent either the wheelbase or pedals from initializing correctly. Check each manufacturer's website for the latest stable release, uninstall old drivers completely before updating, and avoid mixing beta firmware on one device with production drivers on another. Inconsistent driver states often cause devices to enumerate incorrectly in Windows Device Manager.
Forgetting to set pedals to independent USB mode when the unit offers both RJ12 (wheelbase connection) and USB operation is another frequent oversight. Many load-cell pedal sets ship with a default RJ12 mode that only works with the same-brand wheelbase; switching a physical toggle or changing a firmware setting to USB mode is required for standalone operation. Refer to your pedal manual for the exact procedure.
Binding the wrong axis ranges or input channels in-game leads to partial travel, inverted response, or missing brake pressure. After plugging in mismatched hardware, open your sim's controller settings and manually verify that each pedal axis moves the correct on-screen bar through its full range. If the brake shows only 50% travel or the clutch is mapped to the throttle slot, delete the binding and re-assign it while pressing the pedal fully to ensure the sim captures the correct axis ID and range.
Avoiding these four mistakes - incorrect USB topology, driver version mismatches, wrong pedal communication mode, and hasty in-game bindings - will eliminate the majority of compatibility headaches and ensure both your wheelbase and pedals function as independent, reliable inputs.
Connection Validation Checklist
- Both devices appear separately in Windows Device Manager under Human Interface Devices
- Each device shows distinct manufacturer name or model identifier
- Wheelbase LED indicates successful USB communication
- Pedal set registers input in Windows Game Controllers panel (joy.cpl)
- No Unknown Device or error icons in Device Manager
- Both devices maintain connection after Windows reboot
Troubleshooting USB Recognition Issues
When your sim racing pedals or wheelbase fail to appear in Windows Device Manager, start by connecting the device to a different USB port - preferably a USB 3.0 port directly on the motherboard rather than a front-panel or hub connection. Check that any external power supply is firmly seated and delivering voltage; many wheelbases require 12 - 24 V DC and will not enumerate over USB without it. If the device still does not appear, swap the USB cable to rule out a broken or loose connector. Intermittent disconnects often trace to Windows USB power-management settings: open Device Manager, expand Universal Serial Bus controllers, right-click each USB Root Hub, select Properties, go to the Power Management tab, and uncheck "Allow the computer to turn off this device to save power." Update your motherboard chipset drivers from the manufacturer's support page, since outdated USB controller firmware can cause enumeration failures or random dropouts during high-traffic input scenarios.
Conflicting or "ghost" device IDs sometimes block new hardware from registering correctly, especially if you previously used different pedals or a wheelbase on the same USB port. In Device Manager, click View > Show hidden devices, expand the relevant categories (Human Interface Devices, Universal Serial Bus controllers), and uninstall any grayed-out or duplicate entries by right-clicking and selecting Uninstall device - check the box to delete the driver software if prompted. After removing ghost devices, reboot and reconnect your hardware one piece at a time to confirm each enumerates cleanly. If selective suspend remains enabled system-wide, go to Control Panel > Power Options > Change plan settings > Change advanced power settings, expand USB settings, and set USB selective suspend to Disabled for both battery and plugged-in modes. These steps resolve the majority of USB recognition and stability problems without requiring BIOS changes or third-party utilities.
When to Use Third-Party Input Software
Third-party input software becomes necessary when a sim title only recognizes a single controller at a time or when you need advanced remapping features your wheelbase and pedal drivers don't provide. Tools like Joystick Gremlin, vJoy, and DXTweak2 let you merge multiple physical devices - such as separate pedals and a wheelbase - into one virtual controller, ensuring the game sees all axes and buttons as a unified input source. This is particularly useful for older racing games or console ports that lack native multi-device support.
Joystick Gremlin excels at creating custom button macros, remapping axes between devices, and applying non-linear curves to pedal travel for finer brake modulation. vJoy acts as a virtual gamepad driver that other software can write to, forming the foundation for complex input chains. DXTweak2 offers a simpler interface focused on merging DirectInput devices and swapping axis assignments without scripting.
Many modern sim racing titles - including Assetto Corsa Competizione, iRacing, and rFactor 2 - natively recognize multiple DirectInput and USB devices simultaneously, mapping each axis and button independently within their own control menus. In these cases, third-party middleware adds complexity without benefit; the sim's built-in input manager handles mismatched hardware directly. Check your game's controller settings first: if you can assign steering to one device and pedals to another in separate dropdown menus, you won't need external tools.
Use third-party software when your sim imposes a single-device limit, when you want axis inversion or curve tuning beyond what drivers offer, or when you need to combine button boxes and other peripherals into a cohesive layout. For straightforward mismatched pedal and wheelbase setups in modern sims, rely on native support to avoid driver conflicts and input lag introduced by additional software layers.

GTPLAYER Sim Racing Wheel Stand Simulator Cockpit Steering Shifter Mount
When you're pairing pedals and wheelbases from different manufacturers, a mounting platform that doesn't lock you into proprietary attachments becomes essential. The GTPLAYER Sim Racing Wheel Stand Simulator Cockpit Steering Shifter Mount uses adjustable plate spacing and standard bolt patterns to accommodate hardware from multiple brands without requiring adapters or custom drilling.
The stand's wheelbase deck includes multiple pre-drilled mounting holes that align with common bolt patterns from Logitech, Thrustmaster, and other mainstream brands. The pedal plate adjusts forward and backward to match different pedal set depths, and the vertical angle can be tilted to suit your seating preference. This flexibility lets you mount a Logitech wheelbase with Fanatec pedals, or a Thrustmaster wheel with Moza pedals, without worrying whether the attachment points will line up.
At $62.97, the stand positions itself as a budget-friendly option for users who need cross-brand compatibility without investing in a full cockpit rig. The steel frame provides stable support for entry-level and mid-range hardware, though heavier direct-drive wheelbases may require additional bracing to minimize flex during high-force feedback moments. The shifter mount attaches to either side, adding versatility for right- or left-handed shifting setups.
Assembly is straightforward, with labeled components and basic hardware included. The stand doesn't include cable management clips or routing channels, so you'll need to plan USB and power cable paths separately - especially important when running mismatched gear that may require multiple USB connections and external power supplies. The compact footprint makes it practical for smaller spaces, and the stand can be folded for storage when not in use.
If you're building a mismatched setup on a budget and need a mounting solution that works with standard bolt patterns across brands, this stand delivers adjustable compatibility without forcing you into a single ecosystem.
- ✅ Adjustable plate spacing fits multiple wheelbase and pedal brands
- ✅ Standard bolt patterns accommodate Logitech, Thrustmaster, and similar hardware
- ✅ Budget-friendly at $62.97
- ✅ Foldable design for compact storage
- ⚠️ No built-in cable management for mismatched USB and power routing
- ⚠️ May flex under heavy direct-drive force feedback
- ⚠️ Requires separate planning for multi-device cable paths
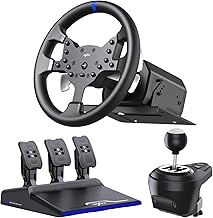
PXN V99 PC Racing Wheel with Force Feedback, Pedals, Shifter, 270/900 Degree
Understanding how bundled wheel sets connect to your PC helps you appreciate the difference when mixing separate components. The PXN V99 arrives as a complete system - wheel, pedals, shifter - and uses a single USB connection from the wheelbase to route all inputs. This integrated approach means the pedals plug directly into the wheel base, which acts as the USB hub for all three components. For new sim racers or those staying within one ecosystem, this design simplifies driver installation and input mapping because the operating system sees one composite device.
The V99 offers 270° or 900° rotation modes and force feedback at $189.99, positioning it as an entry-level all-in-one solution. Because the pedals communicate through the wheelbase rather than independently, you cannot easily separate them to use with a different brand's wheel without adapter hardware or replacing the entire set. This bundled USB routing contrasts sharply with the multi-device workflow required when you connect mismatched pedals and wheelbases - where each component appears as its own controller in Windows Device Manager and requires separate driver packages and input binding in your sim software.
If you plan to upgrade incrementally, starting with separate USB pedals from the outset gives you more flexibility. Bundled sets like the V99 work well when you intend to keep the system intact, but swapping out individual pieces later means managing the USB and software layers independently for each new component.
- ✅ Single USB connection simplifies initial setup and driver installation
- ✅ Includes wheel, pedals, and shifter as matched components at $189.99
- ✅ Switchable 270° and 900° rotation modes with force feedback
- ⚠️ Pedals route through wheelbase, limiting use with other brands without adapters
- ⚠️ Integrated USB design reduces flexibility for incremental upgrades
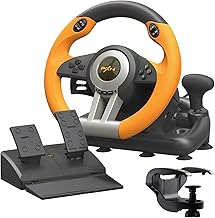
PXN V3 Pro PC Racing Wheel with Pedals, 180 Degree
The PXN V3 Pro connects to PC via a single USB cable that carries both wheel and pedal signals through one unified driver package. Its 180-degree rotation range makes it a compact option for desks or small cockpits where full-lock steering isn't practical, though the limited arc will feel restrictive in rally sims or trucks that benefit from hand-over-hand technique.
Windows recognizes the unit as one composite device, so device manager shows a single HID entry rather than separate wheel and pedal controllers. This simplifies initial setup but means you cannot isolate the pedals as a standalone input source without physically disconnecting the wheel - a key limitation if you later upgrade to a higher-rotation wheelbase and want to keep using these pedals.
Driver installation is straightforward: download the PXN utility, assign the device to the correct USB port, and let games auto-detect the combined input. Because the pedals share the wheel's USB endpoint, calibration and dead-zone adjustments happen through the same software panel. If you plan to mix brands down the road, budget for a standalone pedal set with its own USB interface; these units are designed to work as a matched pair rather than modular components.
The 180-degree constraint suits arcade-style racers and casual sessions where quick inputs matter more than realistic lock-to-lock feel. For titles that expect multiple degrees or rely on precise counter-steering, this wheel will clip rotation early and force you to compensate with higher in-game steering sensitivity, which can introduce twitchy handling on fast straights.
- ✅ Single USB connection simplifies driver setup and reduces port demand
- ✅ Compact 180-degree rotation suits small desks and casual racing
- ✅ Unified software panel for wheel and pedal calibration
- ⚠️ Pedals cannot be separated as standalone USB device for future wheelbase upgrades
- ⚠️ Limited rotation range restricts realism in rally and truck sims
- ⚠️ Composite device structure prevents modular input routing
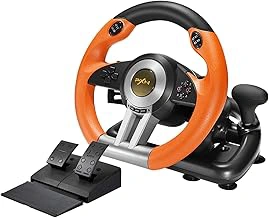
PXN V3II PC Racing Wheel with Pedals
The PXN V3II PC Racing Wheel with Pedals is an entry-level wheelbase and pedal combination that connects to your PC via a single USB cable, making it a straightforward starting point for new sim racers who want to understand basic hardware connectivity. The wheel and pedals operate as a unified device - the pedals connect directly to the wheelbase, and Windows sees the entire system as one controller. This architecture is typical of budget sets but limits future upgrade flexibility, since the pedals cannot function independently if you later replace the wheelbase.
If you plan to mix this wheelbase with higher-quality standalone pedals down the road, you'll need to keep both USB connections active: the PXN V3II wheelbase on one port and your upgraded pedals on another. Some games handle dual-controller input easily through native profile settings, while older or less flexible titles may require third-party tools like Universal Control Remapper or Joystick Gremlin to merge inputs. The pedal set bundled with the V3II cannot be separated and used alone, so any upgrade path means replacing the entire pedal unit rather than swapping piecemeal.
At $79.99, the V3II offers a low-risk entry into sim racing hardware and helps you learn Windows device enumeration, driver assignment, and per-game input mapping without the complexity of multi-brand setups. Its simplicity also means fewer driver conflicts - one installer, one USB hub slot, and straightforward in-game calibration. For users testing whether they want to commit to mismatched gear later, this set provides clear insight into how single-controller and multi-controller topologies differ in practice.
- ✅ Single USB connection simplifies initial setup and driver management
- ✅ Low price point makes it accessible for learning PC input routing
- ✅ Clear upgrade path: add standalone pedals and run dual-controller setup
- ⚠️ Pedals cannot operate independently from the wheelbase
- ⚠️ Upgrading requires keeping both old wheelbase and new pedals connected
- ⚠️ Limited hardware quality compared to modular, standalone alternatives
Final Considerations
Connecting mismatched sim racing pedals and wheelbases on PC requires three core steps: independent USB connections for each device, separate driver installations for each manufacturer, and game-level input mapping to bind all inputs correctly. Most modern racing simulators recognize multiple USB controllers natively, so once each device appears in Windows, you can assign steering, throttle, brake, and clutch inputs inside the sim's control settings without additional software in most cases.
After confirming stable communication between your PC and each device, shift focus to the physical setup. Structural rigidity matters - secure both the wheelbase and pedal plate firmly to prevent flex during hard braking or high-force feedback. Loose mounting can introduce lag or missed inputs as components shift under load. Cable management also improves reliability; route USB and power cables cleanly to avoid snagging, strain, or accidental disconnection during intense sessions.
If a game does not support multiple devices natively, third-party input mapping tools can merge separate controllers into a single virtual device, though this adds a configuration layer. For most users, the native multi-device support in iRacing, Assetto Corsa Competizione, and similar titles will handle mismatched hardware without extra steps once drivers are installed and devices are recognized in Windows.
With connection and mapping complete, your mismatched setup will function as a unified system. Prioritize driver updates, test input response in-game, and ensure mounting stability to maintain consistent performance across sessions.