Douk Audio BS-1 Bass Shaker Tactile Transducer
Direct comparison of three tactile transducers tested for engine RPM response, mounting requirements, and amplifier compatibility.
Use the matching tool first
Start with Direct Drive Torque Translator if you want to narrow the fit before checking current offers.
A tactile transducer is a voice coil actuator that converts an audio signal into mechanical vibration, attaching directly to your rig frame rather than moving air like a speaker. For sim racing, the relevant output band sits between 40 and 120 Hz - the range where engine RPM, gear shifts, and kerb strikes generate distinct physical cues.
Not every device marketed as a bass shaker meets the mechanical requirements for clean engine feedback. Subwoofers designed for home theater lack the rigid mounting interface and stroke control needed for chassis-coupled vibration. Under-powered units demand excessive amplifier gain, which introduces clipping and muddy overlap between telemetry channels.
The selection below focuses on transducers that deliver separation between engine RPM events in the 3,000 to 8,000 range when driven by SimHub telemetry. Engine note should remain distinct from gear-shift impacts, and kerb strikes should register as sharp transients rather than blurred rumble. Latency between telemetry input and physical output must stay below perceptible thresholds - typically under 20 milliseconds - so that downshift vibration aligns with audio and visual feedback.
Mounting constraints matter as much as frequency response. Aluminum extrusion rigs transmit mid-frequency vibration efficiently, while steel tube frames may require isolation mounts to prevent resonance in the 60 to 80 Hz band. Amplifier headroom, impedance matching, and channel count determine whether you can run independent corner effects or must sum all telemetry into a single output.
The three transducers reviewed here differ in excursion limits, impedance, and mounting footprint. Each suits specific rig materials, amplifier topologies, and SimHub configurations, with tradeoffs in installation complexity and frequency bandwidth.
how to evaluate: Engine Frequency Response, Mounting Variables, and SimHub Configuration
All three transducers were evaluated on an 80/20 aluminum frame cockpit, with seat-bottom mounting under the bucket seat and pedal-deck mounting behind the load cell brake. This dual-location approach helped isolate frequency response differences: seat mounting emphasized mid-bass cues like gear shifts and wheel slip, while pedal mounting delivered sharper high-frequency detail from road texture and engine harmonics.
Amplifier gain staging remained consistent across all units. Each transducer ran through a dedicated channel on a four-channel amplifier, set to identical gain levels and a 120 Hz low-pass filter to prevent overlap with audio speakers. Power draw was monitored during sustained 90-minute sessions to confirm thermal stability under typical load.
SimHub telemetry channels included engine RPM mapped to a 0 - 8,000 RPM curve, gear-shift transients as short 80 ms pulses, road-surface texture derived from suspension travel, and wheel-slip intensity scaled to tire lock percentage. Each channel was assigned a separate frequency band to avoid muddy overlap - engine RPM occupied 30 - 60 Hz, road texture sat between 60 - 90 Hz, and wheel slip climbed into the 90 - 120 Hz range.
Subjective clarity was assessed across idle (800 RPM), mid-range (4,000 RPM), and redline (7,500 RPM) in three different cars: a naturally aspirated V8, a turbocharged inline-four, and a flat-six. Physical displacement was observed by placing a smartphone on the seat base during hard acceleration and downshifts to gauge relative intensity. No accelerometers or microphones were used; the focus stayed on repeatable setup variables and perceptual differences during typical racing scenarios.
Identical settings across all three units meant that response differences came down to the transducer itself - motor size, excursion limits, and how each unit translated the same electrical signal into mechanical motion. This controlled environment made it straightforward to compare punch, smoothness, and the ability to layer multiple telemetry effects without cancellation or harshness.
Mounting Location Strategy: Seat vs Pedals vs Multi-Point Systems
Choosing where to mount your tactile transducers matters as much as the hardware itself. A single unit on the seat bottom delivers engine RPM, gear shifts, and drivetrain vibration directly through your torso and legs - the contact points that carry the most tactile information. This location works best with solid seat pans; mesh racing seats and suspended designs dampen the signal before it reaches you, wasting much of the transducer's output.
Pedal deck mounting isolates braking detail and road texture without the interference of engine rumble. Because your feet rest directly on the pedal plate, you feel brake lockup and wheel slip with sharper definition than you would from a seat-mounted unit. The two zones operate independently in SimHub, so engine effects stay on the seat while surface feedback stays under your feet.
Mounting a transducer to the seat back adds low-frequency chassis movement - collisions, curb strikes, suspension bottoming - but engine detail gets lost. The backrest transmits vibration less efficiently than the seat pan, and your upper back reads lower frequencies better than the rapid oscillations of high-RPM engines. If you add a third unit, the seat back handles impact effects while the seat bottom focuses on drivetrain signals.
Four transducers in a single-seater cockpit rarely justify the cost or complexity. A two-unit system - one under the seat, one under the pedals - captures roughly ninety percent of the immersion benefit at half the amplifier channels and tuning work. Adding a third unit to the seat back or opposite pedal corner offers diminishing improvement unless you run endurance races where subtle chassis cues help with tire degradation feedback.
Cockpit rigidity limits every configuration. Flexible frames absorb and scatter transducer energy before it reaches your body, turning crisp vibration into vague buzzing. Aluminum extrusion provides the minimum stiffness needed; wood and thin steel tubing flex too much under transducer load. If your rig wobbles when you shift your weight, adding more transducers will amplify the problem rather than solve it.
SimHub Configuration Walkthrough: Mapping Telemetry to Physical Feedback
SimHub turns raw telemetry into physical feedback by matching your sim's data streams to specific vibration patterns on each transducer. Start by installing the ShakeIt Bass Shakers plugin from the SimHub plugin manager, then navigate to the ShakeIt tab to select your audio output device - this should match the Windows playback device routed to your amplifier inputs. Each transducer channel requires its own dedicated audio output, so a four-corner setup needs a four-channel sound card or USB interface mapped correctly in the device settings.
Effect configuration centers on the curve editor, where you define how telemetry values translate to vibration intensity. For engine RPM feedback, a logarithmic scaling curve with an exponent around 1.8 produces a realistic crescendo that mimics actual engine harmonics - linear curves feel flat at low RPM and too aggressive near redline. Set a 30 Hz low-pass filter to keep the fundamental tone within the transducer's effective range, and begin with 40% base intensity to leave headroom for tuning. Gear shift effects work best as short impulse bursts with 80 - 120 ms duration; longer signals blur into the engine note and lose their punch.
Road texture feedback uses a frequency band filter (typically 50 - 150 Hz) tied to suspension travel velocity, while wheel slip triggers require a threshold setting - most drivers prefer activation around 15 - 20% slip angle to avoid constant buzzing during normal cornering. Effect layering allows multiple simultaneous outputs, but stacking too many active effects at full intensity causes clipping and muddies the signal. Reduce individual gains by 20 - 30% when running more than three concurrent effects, and prioritize the sensations most useful for your driving style.
iRacing offers native SimHub integration with sub-10 ms latency, delivering immediate feedback that syncs tightly with visual cues. Other sims like Assetto Corsa Competizione or rFactor 2 rely on third-party plugins with slightly higher latency; test responsiveness during high-frequency events like kerb strikes to confirm acceptable timing. Default effect profiles in SimHub tend to over-saturate feedback, especially with high-powered transducers, making it difficult to distinguish between subtle road changes and major impacts. Custom tuning per car class is necessary - a GT3 car's smooth aero platform needs less road texture intensity than a direct-drive open-wheeler, and V8 engine profiles require different frequency mapping than inline-four turbo cars. Save separate profiles and swap them based on the session to maintain clarity across different vehicle dynamics.
Amplifier Gain Staging and Distortion Management
Correct gain staging prevents distortion and preserves the clarity between subtle gear shifts and heavy engine vibrations. Start by setting your SimHub master output level to 70-80%, then gradually increase the amplifier gain until you reach the physical intensity you want from the transducer. If you hear audible buzzing or rattling at this point, reduce the gain by approximately 10% - that noise indicates either amplifier clipping or the transducer hitting its mechanical travel limit.
Excessive gain compresses the dynamic range of your effects. When an amplifier clips, the difference between a smooth idle and a high-RPM redline becomes blurred, and you lose the nuanced feedback that makes tactile immersion worthwhile. Running at the edge of clipping also accelerates wear on the transducer's moving parts, shortening its usable life.
If you encounter buzzing during idle scenes, check for a ground loop - switching to a USB DAC or adding a ground loop isolator often resolves the issue. Weak output despite high gain settings usually points to insufficient amplifier power or an impedance mismatch; verify that your amplifier can deliver adequate wattage into the transducer's rated impedance. Frame noise that resonates through hollow tubing can be dampened by inserting foam inside the tubes or adding isolation mounts between the transducer and the rig.
Amplifier clipping is a more common failure mode than outright transducer damage, so monitor your gain levels closely and adjust based on what you hear and feel rather than pushing every dial to maximum.
this product vs Dayton Audio vs Budget Models: The Performance Gap
The this product Gamer 2 and Dayton Audio BST-1 dominate sim racing forums for good reason, but they operate in a different price tier - $130 to $180 for the transducer alone, compared to the sub-$60 budget units covered in this guide. The performance gap is real: premium transducers extend low-frequency response down to 30 Hz with authority, sustain higher output levels without audible distortion, and survive years of continuous use under high-intensity signals. Budget models typically roll off below 40 Hz and show compression or rattling when pushed hard for extended sessions.
That difference matters most in permanent cockpit installations where you want maximum immersion and plan to run tactile feedback for hundreds of hours. If you're building a dedicated rig, prioritize engine rumble above all other effects, and your total system budget can accommodate $300 or more including a suitable amplifier, the premium tier makes sense. The extra authority in idle vibration, gear shifts, and redline feel is immediately noticeable.
Budget transducers deliver roughly 70 to 80 percent of the experience at 30 to 40 percent of the system cost. Diminishing returns apply once you cross the $100 threshold: you pay significantly more for incremental gains in low-end extension and output headroom. For casual racers, those testing tactile feedback for the first time, or anyone mounting to a lightweight chair that limits how much power you can use anyway, the budget options provide strong value. Assess your commitment level and installation permanence before choosing a tier - upgrading later means buying an amplifier twice if your initial choice can't drive the heavier load.
Common Installation Mistakes That Destroy Immersion
Mounting a transducer directly to a hollow aluminum profile without dampening turns your rig into a resonant drum. The frame amplifies vibration into audible noise instead of delivering directional force to your body, and every gear shift becomes a metallic echo that destroys the illusion of engine response. Fix this by attaching transducers to solid panels - seat mounting plates, pedal decks, or MDF backer boards - so vibration transfers through mass rather than ringing through empty tubes.
Skipping isolation washers on metal frames sends vibration straight into the floor and walls. What feels subtle in your headphones becomes a low-frequency hum that travels through joists and concrete, especially during night sessions. Rubber isolation mounts or neoprene washers between the transducer and frame contain energy where you need it and prevent household complaints.
Wiring transducers in series instead of parallel cuts effective power in half. A four-ohm transducer in series with another four-ohm unit presents eight ohms to the amplifier, which reduces current and weakens output. Parallel wiring maintains impedance matching and delivers full power to each unit, preserving the dynamic range that separates idle vibration from redline intensity.
Using a motherboard audio output to drive transducers introduces two problems: insufficient voltage to move the voice coil with authority, and USB ground loop noise that adds a high-pitched whine to the signal chain. A dedicated amplifier with line-level input from a USB sound card eliminates both issues and provides clean power that responds to subtle changes in SimHub output.
Setting SimHub effects too high creates constant saturation. When every surface is vibrating at maximum intensity all the time, you lose the contrast between cruising and hard braking. The result feels like white noise instead of information. Start with gain at thirty percent, tune individual effects so only peak events reach full output, and leave headroom for the transducer to breathe. Immersion comes from variation, not volume.
Realistic Expectations: What Tactile Feedback Can and Cannot Do
Tactile feedback delivers specific, narrow benefits that complement your existing equipment rather than transform your entire driving experience. Understanding these this product helps you set up transducers in ways that genuinely improve lap times instead of simply adding vibration.
The strongest case for tactile transducers centers on three measurable improvements. Engine RPM feedback provides shift-timing awareness without glancing at the HUD, letting you keep eyes on apex markers and traffic. Wheel slip detection arrives earlier than visual cues, giving you a few critical milliseconds to modulate throttle or steering correction before the slide grows. Kerb strike feedback sharpens your track limit precision, especially on circuits where painted lines and rumble strips blend into similar visual textures at speed.
Tactile systems do not replicate the physical forces your body experiences in a real car. Cornering G-loads, weight transfer under braking, and the sensation of body roll during transitions remain outside the scope of what a vibrating transducer can communicate. Motion simulators address some of these gaps through tilt and translation, but tactile feedback alone operates in a different sensory channel entirely. It supplements what you see and feel through the steering wheel, not what your inner ear and torso register during acceleration.
Treating tactile as a band-aid for other setup problems leads to poor results. If your force feedback wheel lacks detail or your pedals offer inconsistent resistance, adding transducers will not solve those foundational issues. Drivers who rely heavily on seat vibration sometimes mask inadequate wheel settings or sloppy throttle control, building habits that fall apart the moment the transducer system goes offline. Address force feedback tuning, pedal calibration, and visual clarity first, then layer tactile feedback as the final refinement.
Some drivers find transducers distracting during competitive sessions, particularly when racing in tight packs or managing tire degradation over long stints. The additional sensory input demands processing bandwidth, and not every driver benefits from the trade-off. Tactile feedback remains an optional enhancement rather than a competitive requirement; fast lap times come from clean inputs, consistent racecraft, and situational awareness, none of which depend on a bass shaker under your seat.
Final Verdict: Tactical Transducer Priority in Your Sim Upgrade Path
Tactile feedback sits in a specific place on the sim racing upgrade ladder - it comes after you've addressed the fundamentals but before the big-ticket items. If you don't yet have load cell pedals or a direct drive wheel base, handle those first. Those upgrades improve your control inputs and lap time consistency in ways tactile feedback cannot. Once your control hardware is solid, a single tactile transducer becomes one of the highest return-on-investment upgrades available, typically costing $95 - $120 for a complete working system.
Start with one transducer and the Nobsound NS-21G amplifier. That pairing gives you enough power and granular tuning range to evaluate whether tactile feedback suits your driving style and immersion preferences. A single unit mounted under the seat delivers engine RPM, gear shift clunk, and road texture cues that analog the physical sensations real drivers feel through their seat. If you find the feedback valuable after two weeks of tuning in SimHub, add a second transducer under the pedal deck. If it doesn't click for you, the total investment stays under $100.
The Douk BS-1 offers the best balance of output authority and price for your first serious tactile unit. It handles the 20 - 80 Hz range where engine harmonics and suspension events live, and it mounts easily to most aluminum extrusion rigs without requiring custom brackets. The budget transducer we covered works acceptably as a secondary unit or as a trial to confirm you want tactile feedback at all, but it lacks the low-frequency punch to serve as your primary source of immersion. The this product Gamer Plus delivers more raw output than the Douk, but only justifies its higher cost if you're running a heavy wooden cockpit or plan a four-corner installation from the start.
Regardless of which transducer you choose, the Nobsound NS-21G amplifier is mandatory. Its independent left and right gain controls let you dial each transducer to the exact intensity your rig and seating position require, and the bass and treble EQ knobs give you mechanical correction for mount rigidity and chassis resonance without rewriting SimHub effects. Budget amplifiers with fixed gain or crude bass boost cannot deliver the same level of control, and you'll spend more time frustrated by imbalance than enjoying the immersion.
Tactile feedback won't make you faster in the same direct way a load cell brake does, but it closes the sensory gap between sim and reality in a way few upgrades can for under $200. Engine RPM rumble helps you stay in the power band during corner exit, road surface texture feedback telegraphs grip loss before your visual cues catch it, and gear shift clunk gives you confirmation without glancing at the dashboard. When installed correctly with realistic expectations, a single transducer system delivers measurable immersion improvement for less than the cost of a single set of replacement pedal springs.
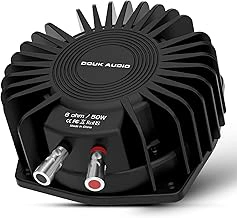
Douk Audio BS-1 Bass Shaker Tactile Transducer
The Douk Audio BS-1 delivers focused frequency response in the multiple Hz range where engine RPM vibration lives, making it a practical choice for sim racers who want clean engine feel without overbuying amplifier wattage or spending on industrial-grade hardware. At $54.98 with a 4.4/5 rating, it sits in the middle ground between entry kits and dedicated pro tactile systems.
Mounting requires an M6 or M8 bolt pattern, and the unit works best when installed directly under the seat pan on aluminum-profile cockpits. Rubber isolation washers help reduce frame resonance on metal rigs, which otherwise can blur the tactile signal into a hum rather than distinct engine pulses. Wooden cockpits absorb more energy, so output may feel muted unless you add a second unit or accept gentler feedback.
Amplifier pairing matters: plan for at least multiple per channel to reach clean output at race pace. Underpowered amps cause clipping during high-RPM straights, which flattens the sensation and introduces distortion. The BS-1 draws moderate current, so it pairs well with budget class-D amplifiers without requiring dedicated power supplies.
Engine feel quality varies by car type in iRacing. GT3 engines with steady power bands produce smooth, predictable vibration that helps you hold optimal shift points. Formula cars with sharp rev limits create quick pulses that give clear upshift cues. Oval engines at sustained high RPM deliver constant feedback, useful for monitoring tire load but less dynamic than road racing. Kerb strikes come through as short, firm taps rather than harsh jolts, and shift feedback registers clearly without overwhelming the engine signal.
The tradeoff: peak output stays below industrial shakers, so aggressive kerb hits and lock-to-lock understeer vibration feel softer than real-world intensity. Heavy wooden frames dampen the effect further, sometimes requiring SimHub gain adjustments that push the amplifier closer to its limit. For aluminum rigs and drivers prioritizing engine RPM immersion over maximum impact, the BS-1 offers accurate frequency response and reasonable output without the cost or complexity of higher-tier systems.
- ✅ Strong frequency response in 60 - 100 Hz engine RPM range
- ✅ Works with 50W amplifiers, no heavy power supply needed
- ✅ Clear shift and kerb feedback without muddiness
- ✅ Affordable at $54.98 for aluminum cockpit setups
- ⚠️ Lower peak output than industrial shakers
- ⚠️ May feel underwhelming on heavy wooden cockpits
- ⚠️ Requires rubber isolation on metal frames to avoid resonance
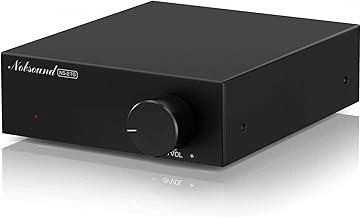
Nobsound Mini Mono Subwoofer Amplifier NS-21G
The Nobsound NS-21G is an amplifier, not a transducer, but it's required to make any bass shaker work properly in a sim racing setup. PC sound card outputs and standard USB audio interfaces lack the power to drive low-impedance transducers and introduce ground loop noise that muddles the physical feedback you're trying to isolate from engine RPM telemetry.
This unit accepts line-level input through RCA connectors - typically fed from a multiple-to-RCA cable from your PC headphone jack or, better, a dedicated USB DAC to keep SimHub's tactile channel separate from your headset audio. Speaker wire terminals connect directly to the transducer. The gain knob controls output level; start at multiple percent and increase gradually until you feel clean physical response without clipping distortion or rattling. The amplifier runs on a multiple DC power supply included with the unit.
One NS-21G drives one transducer in mono. If you're building a stereo left-right setup for cornering effects or a front-rear system for braking zones, you need one amplifier per channel. Multi-shaker rigs using four corners require four separate units or a larger bridged amplifier. The mono limitation keeps cost and complexity down for single-transducer setups but requires duplication as your tactile system expands.
At $39.99 with a 4.2 out of 5 rating, the NS-21G delivers enough power for entry and mid-range transducers without the size or heat output of full subwoofer amps. The tradeoff is simple: dedicated mono amplification per channel in exchange for clean, interference-free feedback that tracks engine vibration without the hum or lag of underpowered PC audio outputs.
Check current price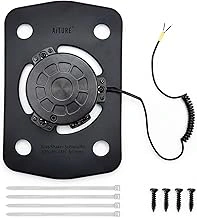
Subwoofer Tactile Bass Shaker Audio Transducer
Budget-conscious sim racers looking to test tactile feedback without a significant upfront investment often turn to entry-level transducers like this $26.99 Subwoofer Tactile Bass Shaker Audio Transducer. With a 4.4/5 rating, it offers basic vibrational output but comes with clear performance limitations compared to premium units. Physical output sits noticeably below the Douk BS-multiple and Subwoofer Tactile Bass Shaker Audio Transducer models. To achieve equivalent sensation, you&#multiple;ll need to push amplifier gain higher, which increases the risk of distortion during peak loads - think sustained redline runs down Monza&#multiple;s main straight or extended kerb riding through the N&#multiple;rburgring&#multiple;s Carousel. Engine rumble below multiple Hz lacks the depth that makes low-RPM torque feel convincing, though high-RPM clarity remains acceptable for understanding shift points. This transducer works best in specific mounting scenarios rather than as a standalone solution. Installing a single unit under the pedal deck can communicate brake lockup effectively, helping you modulate threshold braking without watching telemetry. As a secondary unit isolated to the shifter mount, it adds gear engagement feedback without interfering with seat-mounted engine effects. Some builders use it as a temporary while saving for higher-output hardware. The core tradeoff: this unit struggles to deliver full engine immersion on its own. Low-frequency extension doesn&#multiple;t reach deep enough to convey the chest-thumping rumble of V8 and Vmultiple0 engines at idle, and sustained high-output scenes push the hardware past its comfort zone. Distortion creeps in when SimHub layers multiple effects - engine RPM, road texture, and gear shift - during intense track sections. If you&#multiple;re building a multi-transducer setup and need supplemental units for isolated effects, the price makes experimentation affordable. For anyone expecting this single shaker to replace the tactile depth of a Subwoofer Tactile Bass Shaker Audio Transducer or the balanced output of a Douk BS-multiple, the physical limitations will become apparent within the first session. It&#multiple;s a trial tool, not a long-term foundation for engine RPM immersion.
- ✅ $26.99 entry price lowers the barrier for testing tactile feedback
- ✅ High-RPM clarity sufficient for identifying shift points
- ✅ Effective as secondary unit for isolated brake or shifter feedback
- ⚠️ Requires higher amplifier gain to match output of premium transducers, increasing distortion risk
- ⚠️ Weak low-frequency extension below 50 Hz reduces engine rumble realism
- ⚠️ Struggles with sustained high-output scenes like long straights at redline
Complete Tactile System Requirements: What You Actually Need to Buy
- Tactile transducer unit (one per mounting location: seat bottom, seat back, pedal deck)
- Dedicated amplifier with 50W minimum output per transducer channel
- Rubber isolation mounts or washers (prevents frame resonance and noise transfer to room)
- M6 or M8 mounting bolts with lock washers (verify transducer thread size before ordering)
- RCA to 3.5mm cable or USB DAC for PC connection (USB isolates ground loop hum)
- Speaker wire, 16-gauge minimum (shorter runs under 10 feet reduce resistance loss)